The Provident Homemaker
  • Recipes and Info
    • Making Bread
  • My Blog
  • Favorite Resources
  • Documents and Files
  • 52 Weeks of Building Storage

Light and Fluffy Natural Cherry Frosting

8/24/2013

0 Comments

 
Picture
Or try the Cherry Cheesecake Frosting version.

Yes, if you've noticed a common thread in the last few frosting recipes, I have a thing for cheesecake!

Once again, the basic recipe is the no-cook Ultra Gel frosting, though you can use cornstarch or flour if you're willing to cook the initial mixture.

The difference between this and the others I've tried is that the earlier ones all used pureed fruit or else jam as part of the ingredients.  This time I used concentrated fruit juice- in this case, a delicious cherry-pomegranate blend- the kind that comes frozen in 12-ounce cans. This opens up all KINDS of possibilities!  Use lemonade concentrate- or orange passionfruit mango- or whatever else is in your grocer's freezer.

In the photo above, after spreading the frosting on the cake top, I mixed 1/4 cup of jam with about 1- 1 1/2 Tbsp. water, dribbled in parallel diagonal lines, then ran a butter knife lightly through it, alternating directions every other time, to create the chevron pattern.  Then I added the border.

To protect the frosting from drying out overnight, since this one was made ahead of time, I stuck mini marshmallows on the ends of toothpicks, poked them into the cake, then rested plastic wrap on top of the now-blunt toothpicks.  Works great.

Cherry Cloud Frosting

2 sticks butter, cut into tablespoon-sized pieces, OR 1 stick of butter and 8 oz cream cheese
1 c. sugar
1/4- 1/2 c. Ultra Gel* (higher amount if yours is fluffy like powder snow, lesser if dense like baking soda is)
1/8 tsp. salt
1 c. (8 oz.) juice concentrate, thawed
1 tsp. vanilla or almond extract

Beat the butter until smooth, then add everything else at once: sugar, starch, salt, juice concentrate, and extract.  Beat on low for one minute, until combined, then beat on high 5-6 minutes, until fluffy.

*If you don't have Ultra Gel, you use cornstarch or flour. Substitute 1/4 cup cornstarch, or 1/2 cup flour.  Whichever you choose, mix it with the sugar in a small saucepan, then gradually stir in juice concentrate.  Bring to a boil, stirring often; cook and stir until thick, about 4-5 minutes. Cover and cool to room temperature, then add all other ingredients and beat until fluffy.

To make the 'cheesecake' version, use only 1 stick of butter, and one 8-oz block of cream cheese, softened.

0 Comments

Individual Tamale Pies

6/25/2013

0 Comments

 
Picture
The sauce in this filling is from my great-grandmother, who I hear was an excellent cook. She lived in the ‘Mormon’ colonies in Mexico, left in 1912 to avoid Pancho Villa and other warring factions, returned after the Revolution, and earned money through millinery (making hats) and sewing.  Her last few years were in Arizona, where she cooked and sewed at the LDS Mesa temple.   This recipe was her enchilada sauce, only she used 3 cups of water and 3 Tbsp. chili powder when using it over enchiladas, since more liquid is needed for those.  

These are gluten-free if you use cornstarch and not flour in the filling.  Using shredded meat instead of burger makes these a little more authentic, but ground meat is awfully convenient.  Unless you happen to have some leftover roast available to shred.

Individual Tamale Pies 
Makes 12 muffin-sized ones, or can be made into a 9" pie pan

Crust:
2 c. masa harina  (OR use 1 c. cornmeal and 1 c. flour)
1/2 tsp. salt
1/4 c. coconut oil or other fat (oil, butter, lard, etc)
about 3/4 to 1 cup water

Preheat the oven to 400 degrees.  Mix all together to form a moderately thick dough.  Grease 12 muffin cups.  Shape a ball a little bigger than a ping pong ball (3 Tbsp. dough), then press dough in a muffin cup, making a layer about 1/4"- 3/8" thick.  Repeat until finished.  Set aside.  

Filling:
2 cups cooked burger or shredded beef, pork, or chicken
8 oz. can tomato sauce
2 Tbsp. butter, optional
1/2 tsp. salt
1 Tbsp. sugar
2 Tbsp. chili powder or to taste
1 Tbsp. cornstarch OR 2 Tbsp. flour

 Mix together the meat, tomato sauce, butter, salt, sugar, and chili powder, and bring to a boil.  Stir the cornstarch or flour into 1-2 Tbsp. water,  to form a slurry.  Gradually mix the slurry into the boiling mixture, cook and stir until thickened, about a minute.  Taste it and add a little more salt if you like.

Spoon 1/4 cup of filling into each of the lined muffin cups.  Bake for 15-20 minutes, until the crust is set and the filling just starts to bubble around the edges.  Let sit for a couple minutes, then remove them by placing an upside-down cookie sheet on top, then flipping the whole thing upside down (see slideshow below).  

Serve with plain or with shredded cheese, sour cream, chopped tomatoes, lettuce, or anything else that sounds good.


0 Comments

Easter Story Cookies

3/27/2013

0 Comments

 
Picture
A friend sent me instructions for making Easter Story Cookies.  I tweaked the ingredients, tweaked the instructions, and changed some of the scriptures to ones I thought my younger ones would relate to.  (In other words, I don't know whose idea this originally was, but should no longer be considered plagiarism.:) 
This is a sweet way to bring some of the real meaning of Easter into your home!  For more Easter ideas, click on the "Easter" category on the right.

Mix these cookies the evening before Easter, they sit in the oven overnight, as an Easter morning surprise.

You will need:
  • 1 tsp. vinegar
  • 3 large egg whites
  • Pinch of salt
  • 3/4 cup sugar
  • 1 cup pecan pieces
Wooden spoon
Waxed paper or parchment
Masking tape
Bible

Preheat the oven to 325 degrees. (This is important, so don’t wait until you’re half-way done with the recipe).

Smell the vinegar. Put 1 tsp. into the mixing bowl. Explain that when Jesus was thirsty on the cross, He was given vinegar to drink. Read John 19:28-30 or Psalms 69:21

Add egg whites to the vinegar.
Explain that eggs represent life. Jesus gave His life to give us life. Read John 10:9-11.

Sprinkle a little salt into each hand. Taste it and brush the rest into the bowl.
Explain that this represents the salty tears shed by Jesus’ followers, and bitterness of our sins.  Show the wooden spoon, it represents the cross he carried and was nailed to.
Read Luke 23:27.

With a mixer, beat on high speed until soft peaks form.
Explain that the color white represents the purity of those whose sins have been cleansed by Jesus. Read Isaiah 1:18 and John 3:1-3.

So far the ingredients are not very appetizing. Add 3/4 cup sugar, a tablespoon at a time, as you continue to whip.  Keep mixing until they reach stiff peaks.
Explain that the sweetest part of the story is that Jesus died because He loves us. It wasn’t the nails that kept Him on the cross because nothing earthly could have. It was His love for us! Read Ps. 34:8 and John 3:16.

Fold in the nuts using the wooden spoon. Drop by teaspoons onto wax paper covered cookie sheet. Explain that each mound represents the rocky tomb where Jesus’ body was laid. Read Matthew 27:57-60.

Put the cookie sheet in the oven and close the door and turn the oven OFF! Each person places a piece of masking tape and seals the oven door. Read Matthew 27:62-66

Explain that they may feel sad to leave the cookies in the oven overnight. Jesus’ followers were in despair when the tomb was sealed. Read John 16:20, 22.

On Easter morning, watch the 4-minute video “He is Risen”, then open the oven and give everyone a cookie.

Notice the cracked surface and take a bite. The cookies are hollow!

Explain that on the first Easter, Jesus’ followers were amazed to find the tomb open and empty.  Suggested scriptures to read: John chapter 20 (5 minutes), 1 Corinthians 15:22 (two lines), Mosiah 16:6-9 (one minute).

Happy Easter, Everyone! Christ Lives & Loves Us!

0 Comments

Healthy Peanut Butter-Chocolate Banana Bars

3/23/2013

1 Comment

 
Picture
These have fiber, protein, and are much lower in sugar than almost any baked treat!  And they really are good.  My family snarfed down this batch. 

Besides all that, they're also wheat-free and dairy-free.

Healthy Peanut Butter-Chocolate-Banana Bars

1 1/2 cups cooked white beans (one can, drained and rinsed)
2 eggs
2 ripe medium bananas
1/2 c. peanut butter
1/4 c. brown sugar or honey (or 1/2 c sugar, if you like things on the sweeter side)
2 tsp. vanilla
1 tsp. baking powder
1/2 tsp. salt
1/2 cup quick-cooking oats
1/3 c. chocolate chips (the darker the better)

Preheat oven to 350 F.  Put the beans, eggs, bananas, peanut butter, brown sugar, and vanilla in a food processor or high-powered blender.  Run until very smooth.  Stir in the baking powder, salt and oats.  Spread in a greased 8x8 pan then sprinkle with chocolate chips.  Bake 30 minutes or til test done with a toothpick.  Cool at least 15 minutes before cutting.  These are even better the next day.

For a variation on this, substitute pumpkin puree for the banana, increase sugar/honey to 1/2 c., replace almond or cashew butter for the peanut butter, then add 1-2 tsp. pumpkin pie spice.
1 Comment

Almost Taco Salad

3/20/2013

0 Comments

 
Picture
Why is it almost Taco Salad?  Because there's no tostada or chips with it.  If you want full-blown Taco Salad, just add some.  Pretend they're corn-chip croutons.  I didn't use those because of a sudden urge to make roasted potatoes and didn't want a lot more carbohydrates in the meal.  Besides, if I opened a bag of chips, the whole thing would disappear, and that's anywhere from $1- 2.50, depending on if we're using cheap tortilla chips or Fritos.  The potatoes, as our carb, cost about $ .50 instead.  Yum.

Almost-Taco Salad

 ½ lb. ground beef
1 Tbsp. tomato powder
2 Tbsp. chili powder
Salt to taste
1 head of lettuce (or a half head each Iceburg and red leaf lettuce)
½ green bell pepper
½ red bell pepper
½ c. shredded cheese
1 tomato, cut in wedges
Optional: thin-sliced onion, sliced avocado, jicama cubes, cooked black beans, drained canned corn, canned green chilies....

Cook the beef until browned.  Meanwhile, wash and chop lettuce and veggies.  Put the lettuce in, then add the vegetables and most of the cheese; mix slightly.  When the burger is done, drain off grease, then add tomato powder and chili powder.  Stir to coat, taste and add salt if needed.  Spread out the meat on a plate to cool more quickly.    When it’s cool, top the salad with it and the remaining cheese.

My family thought it was good without salad dressing, but if you want something to drizzle on top, Ranch is a good choice- especially if you mix a little chili powder into it-, OR this:

Creamy Garlic Dressing:

¼ c. plain yogurt or sour cream
1 Tbsp. water or milk
½ tsp. garlic powder
Salt to taste
1/2 tsp. dried parsley, optional, if you want it to look prettier

Whisk until smooth.
Serve with oregano-roasted potato wedges and vegetable sticks.

0 Comments

Black Bean Brownies (or, Chocolate Truffle Brownies)

3/6/2013

0 Comments

 
Picture
Apparently these have been popular in the food world for about a year... but I first saw them last week.  My oldest son, the pickiest eater in the house, had noticed the printed recipe sitting on the counter for several days, grimacing everytime he walked past it.  So when a batch of brownies appeared out of the oven, he cocked an eyebrow at me, asking "Are these what I think they are?", then declared he would NOT eat them.
After everyone else begged for seconds, though, he decided he'd try just one bite.  Then a whole brownie.  Then he had seconds too.
(YEAH!)

Black Bean Brownies

1 1/4 c. cooked black beans, rinsed (about a 15-oz can or 1/2 c. dry beans- cook first)
3 eggs
1/4 c. melted coconut oil or vegetable oil
1/2- 2/3 cup honey OR 3/4-1 cup sugar (brownies with the higher amounts are sweeter and more moist)
½ cup unsweetened cocoa powder
1 tsp. vanilla extract
½ cup whole wheat flour, OR 1/2 c.gluten-free flour plus 1 tsp. xanthan gum
½ teaspoon almond extract or orange extract, optional
½ teaspoon baking powder
1/4 tsp. salt
½ cup chopped walnuts, optional
¼ cup semisweet chocolate chips, optional


Preheat oven to 350 degrees. Butter or spray a 9x13 pan.  Combine beans, eggs, oil, sugar, cocoa powder, vanilla, and almond/orange extract (if using) in a food processor or blender.  Puree until very smooth.  In a medium bowl, combine flour, baking powder and salt.   Pour the puree over top, then mix both together.  Stir in walnuts if using.  Sprinkle chocolate chips on top.  Bake about 25 minutes or until center tests done with a toothpick.  
Cool.  
To make these into Chocolate Truffle Brownies, omit the chocolate chips and frost with my favorite-ever chocolate frosting: creamy, soft, oh-so-smooth Chocolate Blender Frosting!
0 Comments

When only one of you can't have wheat

3/2/2013

2 Comments

 
Picture
Surely many of you are in the same boat.

Out of the eight of us in the house, we've learned that one child can't have wheat.  She's so sensitive that eating one 1/4" piece of bread caused her arms to turn hot pink and start to weep.  But the rest of us are fine.  We're still in the process of determining if she reacts to gluten, or to just the wheat itself, so for now everything must be wheat-free AND gluten-free.  And dairy-free, while we're figuring out if that's an issue too.  For some strange reason, I prefer to cook only one meal, per meal.  And special 'gluten-free' foods are pricey.  Really pricey.  So I'll let you know how I've adapted.  Hopefully it'll help you or someone else having to adapt to whatever allergy or special needs diet strikes just one or two in your family.  


Eight Tips for feeling (more) normal when someone has special dietary needs

1- Plan on preparing most of your family's foods.  
Unless you have nothing against quadrupling your family's food budget.  Not kidding.   If you didn't cook much before, brush up on the basics.  They'll do for now.  And for a while.

2- Eat naturally wheat-free foods
Keep a list around so you can focus on what CAN be eaten rather than all the CAN'Ts.  It's empowering and encouraging.  While you're still getting used to what's okay and not, go through your kitchen and pantry, and write down everything that is GF already, including all plain spices and herbs (blends might not be; check), canned/fresh/frozen fruits and vegetables, rice, plain beans, flax, buckwheat, meat in its natural state, eggs, peanut butter, olives, potato chips, popcorn, jam, ketchup...  See a bigger list here, halfway down the page.  There's a GF year-supply list here.  You know, I've been telling myself for years that we oughta eat more rice and beans.  They're cheap, store well, and are filling. 
Those have suddenly become more popular at my house.

3- Make a list of 10-15 meals your family likes that are gluten/wheat-free and can be made using what you typically have on hand.  Include both super-quick meals and more involved ones.  Be willing to spend about an hour doing this; it'll save you much more time than that in the long run.  Get input from your kids.  Tape the list someplace handy like the inside of your cooking supplies cupboard.  No more panic or feeling helpless at a change of dinner plans!

4- When you cook some specialty gluten-free food, go ahead and make a big batch.  Then freeze the rest in individual serving sizes.  For my 10-year-old, the ziptop "snack size" baggies are the perfect size.  There's a gallon-sized ziptop bag labeled for her in the freezer. What's in it changes often.  Right now it has GF waffles and breadsticks, spaghetti (made with specialty GF pasta) and sauce, seasoned rice, dairy-free homemade ice cream (made in my blender), and GF chocolate chip cookies.  Remember treats. They've saved my daughter from feeling deprived with all these new "don't"s.  Whenever my husband pulls out the ice cream, she pulls out her freezer bag and gets something sweet too.  I also keep one loaf of GF bread in the freezer, for sandwiches and toast.  She pulls out a couple slices whenever needed.

5- Keep a small plastic bin full of GF baking supplies, like the photo above. It's handy for all kinds of things. My 'essentials' include a bag of GF flour mix (homemade or storebought), xantham gum, some white flour like rice, tapioca, or potato starch, and a whole-grain GF flour like brown rice, lentil, oat, or sorghum.  Mine also has a bag of dairy-free chocolate chips in it, good for a lot more than just cookies.  I've found flours like tapioca, potato starch, and rice flour at the Asian market for a fraction of the price.

6- Try a new GF recipe at least once a week.  And maybe only once a week, depending on how overwhelming it is to you.  Have that other family member cook with you, so she'll learn to cook for herself later.  If you love bread, stick with the quickbreads for a while.  They're much simpler.  I think the easiest way to learn, other than just trying a new GF mix each week, is to buy a copy of of Living Without magazine.  Or sign up for their free weekly newsletter, which includes a recipe.   I love the magazine format because you can learn in 5-minute increments.

7- Remember to watch out for cross-contamination
I think this is actually the hardest one.  You might want to have TWO jars of mayonnaise and jam open, one of each labeled as GF.  Otherwise it's really easy for bread crumbs from one person to end up in the jar, where they'll cause the allergic person grief.  Remember that toasters carry crumbs.  Wipe the counters really well.  Consider having a second set of measuring cups, possibly mixing bowls and cooling racks too, depending on severity of reaction.  If you have a regular wheat grinder you can grind your own GF flours, using things like rice, beans, oats, lentils, quinoa, etc, BUT only use a mill that has not been used for wheat.  Unless you want to invite problems.  Some things can be ground in a blender, like oats, if those are OK for your family member.

And,
8- Read labels.  Always.  Always.
Learn which ingredients have hidden gluten.  You'll be surprised at what you find.  Sometimes good surprises.  Sometimes lame ones.  Realize too that sometimes companies change their ingredients, and something that didn't have gluten/wheat in it before, might the next time you buy it.  Knowing exactly what you're eating is a good idea anyway.


You can do this!  :D

Love, Rhonda
2 Comments

GF CF Chocolate Chip Cookies

2/19/2013

0 Comments

 
Picture
NOTE:  If wheat is not a problem for you (and it's not for me, that I know of...)  this recipe can be made using regular all-purpose flour.

I've been playing around with gluten-free foods for a while now, and sometimes the food is a   little disappointing.  Not so with these.  They were soft and chewy in the center, crispy on the edges, with good texture and flavor.  The recipe was adapted from two nearly-identical recipes from "Life Tastes Good Again" and from the box of SunFlour Mills gluten-free Pastry Flour.  The only thing was, the recipe called for butter and a box of vanilla pudding mix, both of which contain dairy.  Here's the gluten-free AND dairy-free version:

Soft and Chewy GF CF Chocolate Chip Cookies

1 cup dairy-free 'butter', like this recipe (or use real butter if you're OK with it)
3/4 c. packed brown sugar
1 c. granulated sugar
1/4 c. Ultra Gel (a no-cook food starch)
2 eggs
2 tsp. vanilla
2 1/4 c. gluten-free flour blend, like Sunflour Mills GF Pastry Flour  or whatever you prefer
1 1/2 tsp. xanthan gum (omit if using regular all-purpose flour)
1/4 tsp. salt
1 tsp. baking soda
2 c. chocolate chips (dairy free, gluten free) OR 1 c. each nuts and chocolate chips

Preheat oven to 375 degrees.   Cream together the butter, both sugars, and Ultra Gel (or pudding mix).  Beat in the eggs and vanilla.  Add 1 cup of the GF flour, the xantham gums, salt, and baking soda.  Beat until smooth, then mix in the remaining 2 1/4 c. GF flour.  Stir in chocolate chips and nuts if using them.

Drop by heaping tablespoonfuls onto an ungreased cookie sheet.  Bake about 7-9 minutes, or until just browned on the edges and centers still look wet.  Let cookies sit on cookie sheet for 4-5 minutes before removing to a cooling rack.  (They'll fall apart if you move them too soon.)  Makes about 30 cookies.   Store any extras in an airtight container at room temperature or in the freezer.
If you like cookies crispy, cook them until the centers look done.  If you want them chewy, it's critical to essentially underbake them a bit, hence the wet centers.  Baked goods continue to cook even after they come out of the oven. 

*If dairy is not a problem for you either, then you can use a box of instant vanilla pudding in place of 3/4 cup of the sugar, 1/8 tsp of the salt, 1 tsp. of the vanilla, and 1/4 c. Ultra Gel. 

0 Comments

Gluten-free, Dairy-Free German Chocolate Cake

10/23/2012

0 Comments

 
Picture
This weekend I participated in a moms' retreat- our own little 'Education Week'end, you might say. (See here for one of the addresses we heard.)
We each brought food for either the dinner or brunch the next day.  Most of the ladies there try to eat very healthfully, and some of them have dietary issues like gluten intolerance, so I made a gluten-free, dairy-free (CF= 'casein free'- the protein in milk) cake. 

I actually used a cake mix- Pamela's Gluten-Free Chocolate Cake Mix- which uses evaporated cane juice for the sugar, and organic grains.  That way everyone could eat happy.  Everybody- regular wheat-eaters included thought the cake was absolutely delicious.

By the way, this brand of cake mix makes two 8" or 9" layers.  Not all of the GF cakes mixes do.  Some, like Betty Crocker, only make one 8" layer.  So take that into consideration if you're pricing them.

GF CF German Chocolate Cake

Bake and cool one chocolate cake, using a two-layer sized gluten-free mix, or from scratch.  One good recipe is at Living Without.(This recipe calls for 1 c. coffee, to intensify the flavor- if you don't prefer to use coffee, use hot water instead and 1 Tbsp. molasses.  Reduce sugar by 1 Tbsp.)

Lower-fat, Dairy-free Coconut-Pecan Frosting (also egg-free) 
3 Tbsp. potato starch or tapioca starch, OR 5 Tbsp. rice flour
3/4  evaporated cane juice or brown sugar
1 c. coconut or rice milk
¼ c. coconut oil
¼ tsp. salt
1 Tbsp. vanilla
½ c. pecans, toasted and chopped fine
1 c. shredded sweetened coconut, toasted

Stir together starch and sugar, then gradually mix in milk.  Add coconut oil and salt, then heat and stir over medium-high.  Cook and stir until thickened and bubbling.  Remove from heat and stir in vanilla, pecans, and coconut, reserving 1 Tbsp each nuts and coconut for garnish.  Chill first if spreading on a tall cake, frost immediately if spreading on a sheet cake.
0 Comments

Zucchini Cakes

9/4/2012

0 Comments

 
Picture

Who couldn't use another recipe for zucchini right about now?

This year I really HAVE seen cardboard boxes with a "FREE ZUCCHINI" sign written in permanent marker, along the side of the road.
As you can see, this we're not talking about zucchini CAKE... these are tender, flavorful pan-fried morsels, related to crab cakes.  Without the crab.  There's an endless variety of ways to make these, this particular batch has a Southwestern flair, served with a creamy cilantro-scented Lime Chipotle sauce.    We had them for dinner last night and had leftovers.  They would make a nice accompaniment to grilled chicken or beef, but I served them as a meatless main dish.  
This afternoon about 4:00 I suddenly remembered them again- and promptly finished off the last couple of them for a snack.  YUM! (Actually, I took a couple over to a neighbor, who immediately asked for the recipe.)

This is a pretty big batch, I think it made about eighteen 3-inch cakes.  Feel free to cut the recipe in half.  You can always make the full batch, though, and freeze extras.  Bake at 350 for 10-15 minutes to reheat and recrisp, or toast in a toaster oven.  See below for the recipe.

I got a plainer version originally from JustPutzing.com, though her version was tweaked from one on TheLife'sAmbrosia.com    
Neither one of those used corn.  I like it for the sweet flavor it adds, along with some non-squishy texture, but you can certainly leave it out.  If you do, you'll only need 2 eggs.
Feel free to add in different spices, use different kinds of cheese (the original used Parmesan, in half the amount), or serve with different sauces.  Ranch dip would be delicious.  So would honey mustard.    I intend the next batch to resemble crab cakes even more- I'll add Old Bay to them, a little finely-grated onion, add maybe a teaspoon of honey for a hint of sweetness, and serve with tartar sauce.
Picture
Southwestern Zucchini Cakes


1 lb. zucchini (3 small)
1 cup corn kernels (I used canned, then drained them well)
1 c. shredded mild white cheese (I used Havarti 'cause I found it for $2/lb)
2 Tbsp. salsa if you have it around  (OK without but good for color)
1 cup panko bread crumbs (or other crumbs- bread, cracker, gluten-free, etc)
1/2 tsp. salt
2-3 tsp. chili powder (to taste)
3 medium to large eggs, beaten
3-4 Tbsp. cooking oil 


Shred the zucchini on fine or medium holes.  Grab a handful, hold it over a plate or bowl, and squeeze hard to remove excess liquid.  Put the squeezed zucchini in a mixing bowl, and repeat with all the zucchini.
Stir in the corn, cheese, salsa, bread crumbs, salt, and chili powder.  Taste and add more of whatever you think it needs.  Stir in the eggs, cover, and refrigerate for 20-30 minutes.   (You can skip this step, but this gives the mixture time to bind together, as the egg soaks into the crumbs.  This makes them much easier to form and flip.  While it chills, make the sauce below.)
Heat a skillet over medium heat.  Add 1 Tbsp. oil to it.  When oil is nearly smoking, scoop 3-4 Tbsp of the zucchini mixture into the pan, then flatten to about three inches across.  Repeat with as many as will fit in the pan with about 1" between them.  Cook for 4-5 minutes, then flip over.  Cook for another 2-3 minutes, until golden.  
Add another tablespoon of oil to the pan before starting the next panful.

Makes about 18.   Serve warm or room temperature.

Creamy Chipotle Sauce (adapted from America's Test Kitchen)

Note: Chipotle is smoked jalapeno pepper.  I don't have any on hand, so I came up with a similar flavor  with what I DID have, though it wasn't nearly as hot.  If you like more heat, add a little cayenne or red pepper flakes.  If you happen to have canned chipotle around, use 1-2 tsp., minced, in place of chili powder and Liquid Smoke)

2 Tbsp. mayonnaise
2 Tbsp. sour cream (I didn't have this, either- use plain yogurt, or like I did, thick kefir)
1-2 tsp. chili powder (to taste- my kids were happy with just 1 tsp.)
1/4 tsp. garlic powder, or one minced clove fresh garlic
2 drops Liquid Smoke
2 tsp. minced fresh cilantro
1 tsp. fresh lime juice
2 drops lime essential oil if you have it

Stir together.  Cover and refrigerate about 30 minutes to blend the flavors.
Makes about 1/4 cup.

If you double the recipe, you can have leftovers to change into a fabulous salad dressing: Thin down with a little water or lime juice.  Salt and pepper to taste.
0 Comments

Make your own oat flour

8/6/2012

0 Comments

 
Picture
I buy rolled oats by the 25- or 50-pound bag when they're on sale; they're MUCH cheaper that way, and yes, I do actually use that many.  Eventually. 

Last week I bought 50 pounds of oats for $24, which made them $ .48/lb. 

They got divided into food-storage buckets- a 5-gallon bucket will only fit about 15 pounds of oats, labeled, put in a cool & dark place in my house (under beds and in closets can be good).  Then I will refill a container in the kitchen whenever needed. 

They're great for cooking at breakfast, of course, and homemade granola (see recipe in the free "Starter Cookbook" or in The Chameleon Cook), in apple crisp topping (also in both books)... but what else?

Start with rolled oats or quick-cooking oats.  Put about 2 cups of these in a blender.  Cover and run on high for about a minute. 

Ta-da!  Oat flour.  This is great for either the gluten-free cook who can tolerate oats*, or for the rest of us who just like moist and tender baked goods.

Now, what can you do with it?

Use it in yeast bread- about 1/4 cup of this to replace the same amount of wheat flour per each loaf in the recipe.  Oats help make bread moist.  One really delicious version is to not only use the oats, but substitute orange juice for half of the water. 

Quick breads- including pancakes, waffles, biscuits, muffins, and more.  Oats don't have any gluten, so your finished food will be more tender, less tough.  Just don't substitute more than half of the total amount of flour.  For example, in a muffin recipe calling for 2 cups flour, you could use 1 cup of oat flour and one cup of regular flour, or 1/2 cup oat flour and 1 1/2 cups regular flour.  Adding the oat flour will make your regular flour act more like pastry flour.

Mix into cakes and cookies for the same reason as for quick breads, keep the same kind of ratios in mind for best results.  If you want to get the very best results, WEIGH out your flour; the oat flour is a little fluffier or less dense than wheat flour.  You would use just over 5 ounces oat flour for each cup of regular flour you're substituting for.

Use it for 'instant oatmeal' (scroll down to bottom of page) for breakfasts: the pieces are so small, they absorb the water super-fast! in Add it to soups or stews to thicken them.  You can do the same with quick oats, but the oat flour soaks in and disappears much faster!

*Most gluten-intolerant people can handle oats just fine, and others can't.  It seems to actually depend on the variety of oat- there's an excellent article on this at http://ultimateglutenfree.com/2011/06/getting-closer-to-gluten-free-oats/  Buying "Gluten-Free" oats gives you an extra layer of protection; I've seen, myself, batches of oats that had a few wheat kernals mixed in.  The processing machines can't tell the difference, and sometimes a little wheat grows- as a weed- in oat fields!

My sister, who has to cook gluten-free all the time, has a favorite easy, hearty-wholegrain flour blend: equal parts oat flour and lentil flour.  Lentils grind fairly easily in a blender, too.  See here for her post on the flours she uses most often.
0 Comments

Gluten-free, Dairy-free Tres Leches Cake

7/14/2012

0 Comments

 
Picture
With a name like “Tres Leches” (“Three Milks”), you’re not going to get a truly authentic recipe without using dairy, but this one has the creamy moistness of the real deal.  If you can have dairy products, use the ‘tres leches’ mixture from my other, traditional, Tres Leches Cake.


Make the ‘tres leches’ mixture:
1 14-oz can coconut cream (NOT cream of coconut), divided
3/4 c. sugar
1 1/2 Tbsp. coconut oil, or dairy-free margarine
1 tsp. vanilla
1 14-oz can coconut milk

Combine 2/3 c. of the coconut cream, sugar, and oil/margarine.  Boil until thickened and darker; it took about 8 minutes in my microwave.  Add the vanilla and remainder of the coconut cream.  Set aside to cool.

Make the Vanilla Cake from Living Without magazine.  I made it without eggs, as well (more allergies); instructions for doing that are included below the recipe.  (However, I didn’t have egg replacer, so I replaced the 4 eggs with 1/2 c. applesauce, 2 tsp. baking powder, and 3 Tbsp. water.)

When the cake is done baking, let it cool for ten minutes, then poke holes with a skewer, every inch all over the top.  Pour the coconut cream mixture over the top. Refrigerate at least 3 hours; overnight is better.

Whipped (coconut) cream topping
1 14-oz can coconut cream, well chilled
3 Tbsp. sugar, honey, or corn syrup
2 tsp. vanilla
Whip all together until fluffy, then spread on top of cake.   Using the honey or corn syrup will help stabilize the cream so it doesn’t go flat as quickly.
To get REALLY stable whipped cream, soften 1 tsp. unflavored gelatin in 1 Tbsp. water, then dissolve (12 seconds in microwave works).  Let cool slightly before pouring slowly into partially-whipped cream.
0 Comments

Creamy, Dairy-free Lime Silk Tartlets

7/13/2012

0 Comments

 
Picture
Or Lime Silk Pie.  Just put all the filling in an 8" pie crust.  The recipe is also gluten-free.  If you change the fruit to orange, and add cocoa powder, you get Chocolate Truffle Pie.

A friend recently sent me a very strange-sounding chocolate pie recipe, using avocados and coconut oil in the filling for some healthy fat.  It was so unusual I just had to try it!

It was shockingly good.  So good it deserved some variations. 

This one doesn't use cocoa at all, and takes advantage of the natural green color from the avocados.   

Are you intrigued yet?

Toasty Coconut Crust: (or use your favorite crust)
2 Tbsp. honey
½ c. coconut oil
1/4 tsp. sea salt
2 c. toasted fine-flake coconut

Pull out an 8” pie pan, OR for tartlets, line 30 mini-muffin tins with paper liners (optional, for easier removal).  Stir together the honey, coconut oil, and salt.  Add coconut and mix until smooth.  Press into the pie pan or muffin tins.  For the latter, use 1 Tbsp. per mini muffin tin and press.    Put in the freezer for 10 minutes, while you make the filling.  For easiest removal, take the mini crusts out of the pan (still in the liners) when firm, before adding the filling.

Filling:
2 avocados, about 4-5 oz. apiece
½ c. coconut oil
½ c. honey
½ c. fresh lime juice (or use the juice of 3 limes and make up the difference with water)
1 Tbsp. lime zest, or 6-8 drops lime essential oil
2 Tbsp. coconut cream concentrate (optional but softens the sharpness a little)
1 tsp. vanilla
1/8 tsp. salt

Put all the filling ingredients in a blender or food processor.  Puree until smooth.  Pour into your prepared crust.  Chill at least four hours, until firm.  (To speed it up, try 30 minutes in the freezer.)  Let sit at room temperature for 10 minutes if you want the filling a little softer.

Garnish with a dollop of coconut yogurt (or sour cream if dairy’s OK for you) and a bit of lime zest.    Makes one 8” pie or about 30 tartlets.


One website dedicated to avocado recipes - including both unique and stand-by recipes- is TheAmazingAvocado.com   

I'd love to hear back from you once you try this lime pie!

What else do you  do with avocados? 


0 Comments

Gluten-free Pizza Crust

7/10/2012

0 Comments

 
Picture
Do you need a quick pizza crust?  This one doesn't require any rising time, which means you could have a fresh-baked pizza in less time than it takes to order out!

You may like this even if you don't have to avoid wheat or gluten.  If you don't these flours and gluten's OK for you,  the recipe can be modified back to a wheat-based crust; just use a total of 2 cups flour.

Gluten-free pizza crust

1 cup brown rice flour
1/2 cup potato starch
1/2 cup tapioca flour/starch (or adjust these 3 ingredients to total 2 cups)
1 Tbsp. baking powder
1/2 tsp. salt
1 Tbsp. sugar
3/4 to 1 cup water or milk, just off boiling (very hot!)

Preheat your oven to 400 degrees F, grease a pizza pan or baking sheet.
Stir together flours/starches, baking powder, salt, and sugar. Stir in the hot water or milk and stir until it forms a dough. Pat about 1/4" thick onto the pan you're using.  Bake until just set, about 10-15 minutes, depending on thickness. Add your sauce and toppings and return the pizza to the oven until cheese is melted. (I like to put it under the broiler for 2 minutes instead, to get browned & bubbling bits on the cheese.)
0 Comments

Homemade Rice & Roni mixes

4/20/2012

0 Comments

 
For those days that you just don't have time to think what to cook for dinner, have this on hand.  (Thanks, Rebecca!)  You can make up several mixes at once.  Not only are these much less expensive than the boxed version, but you have complete control over what goes in it.  This is especially handy if you have allergies or have to eat gluten-free.

This mix is equivalent to about 2 ½ -3 boxes of Rice-A-Roni.

Homemade Rice & Roni
Serves about 8
(put half as much in the bags to make smaller mixes!)

In a quart size bag, add
2 cups of converted rice
1 cup of broken thin spaghetti  or fideo noodles

Place the following ingredients in snack-sized bags or in an envelope cut in half (cut the short way, fill, fold over, and glue or tape closed)

2 tsp bouillon granules (Optional, you can prepare the mix with stock instead of water.)
2 Tbsp dry onion
1T dry carrots or other dried or freeze-dried vegetable (optional)
1/8th tsp celery seed
1Tbsp. all-purpose seasoning
2 tsp dry parsley
1 tsp garlic powder

*Be sure to write the name of the flavoring mix on the bag along with how much liquid to add to the mix to prepare it. To prepare you will need
2 T butter or oil
5 cups water (or stock if you omit the bullion in your seasoning)
In a 2 quart pan with a tight fitting lid, brown the rice and noodles in the butter or oil until noodles are a nice deep brown, but not burned. Add the water and the contents of the seasoning mix.  Bring to a boil, then cover and reduce heat to low for 20-25 minutes, until tender.

Other flavor ideas:
Mexican:
Use onion and carrot but for seasoning, use 1T taco seasoning, Or 1 tsp each: garlic, cumin, oregano and chile powder.
Oriental: Use onion carrot and celery seed, but also 1 tsp curry and 1 tsp Chinese 5 spice, 1/2 tsp ginger and 1T garlic powder.
Curry Chicken: Use chicken bullion, all the original seasoning plus 1tsp saffron 2tsp curry powder.

For more flavor ideas, browse the boxed pasta section at the grocery store.  You'll be sure to see something that sounds good.  Then make your own!


Instruction label for the bags of mix: 
Picture
0 Comments

Tiny Spicy Chicken, and the monster under the bed

2/25/2011

5 Comments

 
Picture
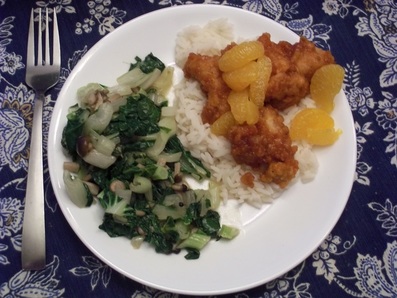
Tiny Spicy Chicken is great over rice, with a little fruit to help balance out the heat.   Bok choy is great on the side.

Do you have children or grandchildren who are afraid of what’s lurking under their beds?  Here’s the perfect solution, found on Meridian magazine online a couple months ago:


The Monster Under the Bed
"I overheard my two young adult sons talking.  One asked, “Do kids really think there are monsters under their beds?”  The other one answered: 'I never did.  There was always so much food storage under there that I knew there was no room for a monster.'”


 So let's all chase out those monsters!  For a lot of suggestions on storing food when you have little space, see the Food Storage Made Easy page.

______________________________

This recipe came from a class at the Macey’s in Logan, back when I lived there.  “Tiny Spicy Chicken” was one of the entrees at Mandarin Gardens, a local Chinese restaurant.  Maybe it’s a Cache Valley specialty, because I haven’t run into anyone not  from there who has had this dish. 


Tiny Spicy Chicken

3 lbs. boneless, skinless chicken, cut into 1 ½ “ cubes
garlic salt
2 beaten eggs
1 cup cornstarch
¼ c. oil

            Sprinkle chicken with garlic salt, let sit for 1 hour in the fridge.  Heat oil in a large frying pan.  Dip chicken into eggs, then roll or shake in a bag with cornstarch.  Brown chicken pieces in the oil, until golden brown.  Put in a greased 9x13 pan.

Shortcut method: use 1- 1 ½ lbs. fully cooked chicken nuggets, frozen is OK.  (Don't use 3 lbs nuggets; they have too much breading that soaks up this sauce.)

 Sauce:
½ -1  tsp. chili paste*

1 c. sugar
½  c. ketchup
2 tsp. soy sauce
Dash of salt
½  c. chicken broth
¼  c. brown sugar
½ c. vinegar

 Sauce will be very runny.  Pour over chicken (if using chicken nuggets, mix the sauce in the 9x13 pan, then add the chicken) and stir to coat.  Bake at 425 degrees for 10-15 minutes, stirring once or twice during that time.  Serve over rice.

Alternate cooking methods: bake at 325 degrees for 1 hour, stirring a couple times, or put in a crockpot and cook on low for 5-8 hours.

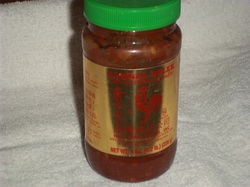
*Sambal chili paste can be found in the Asian section at Macey's grocery store, it probably can be found at most other grocery stores.  If you don't have it, or can't find it, substitute red pepper flakes.  Start with 1/4 tsp., put it in the sauce, then taste to see if it's as hot/mild as you like.
Picture
Chili paste is made from whole, hot chilies, ground up, and mixed with a little vinegar.  It includes the seeds, so it packs a punch.

Picture
If you use raw chicken breasts, the recipe takes about 1 1/2 hours to make.  If you start with these, you can have it done in 20 minutes.

Picture
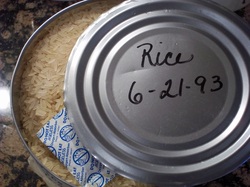
Aren't cans and oxygen packets great?  I opened this can just yesterday.  And yes, 6-21-93 was when it was sealed.

Picture
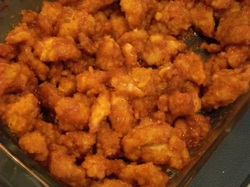
The chicken, coated with sauce, ready to bake.

Picture
Baking it condenses the sauce and helps it soak into the coating on the chicken.  It's a little sweet, and a little zippy. 

5 Comments

EP Moment; Mom's barbecue sauce

11/16/2010

0 Comments

 
Picture
Click here to download a PDF of
the Putting Down Roots pamphlet
(16MB).

Picture
Barbecue Sauce on beef


(originally from 5/27/10)
Here’s a great idea from Meridian Magazine: 

 the “Emergency Preparedness Moment: 

What emergency preparedness activity would you like to do this week for your family? Make this a matter of prayer and you will be surprised at the promptings you can receive. These few minutes every seven days during Family Home Evening can help your children be ready for a variety of emergencies. Problem solving skills, first aid skills, putting together backpack 72-hour kits, or any other kind of creative endeavor shows your family you love them and teaches them how to take care of themselves in tough scenarios. What will you choose this week?” 

You could also find a minute or two while you're driving kids to school or activities. A little bit of time each week can help you cover a LOT of ground. If you need resources, some great ones online are
http://www.fema.gov/areyouready/   http://ussc.utah.gov/publications/roots_earthquake_low.pdf    If you prefer a booklet you can HOLD, both of these are available, free of charge, at the city office building, from the city emergency planner.  Here in South Jordan that’s Dustin Lewis.  He’s happy to pass them out!

Maybe expand the “Emergency Preparedness Moment” into a “Self-Reliant Living Moment”?    See where the Spirit leads you in your quest… 

-Rhonda

 * * * * * * *
Mom's Barbeque Sauce       Makes about 3 cups

2   8-oz cans  tomato sauce (or 2/3 c. tomato powder and 1 1/3 c. water)   1   can/cup water (fill up one of the now-empty tomato sauce cans)   1 chopped onion (size is totally up to you)  or use a handful of dried
A couple sprinkles  of garlic   
pepper to taste   
3-4   shakes   of Worcestershire sauce   
1 Tbsp. vinegar, optional
Sugar, honey, or molasses to taste, anywhere from none to ½ cup

Simmer everything together until flavors combine, at least 10 minutes, or an hour if you have it, to let it thicken and become rich.  This will be even better the next day or later in the week.  Leftovers freeze well.  If using this with hamburger, you can cook the hamburger with the onion and then add the rest and simmer.

If you want to change the flavor a bit, add a spice or two. Some good ones for this are cloves (try 1/8-1/4 tsp.), oregano (about 1 tsp.), chili powder (1-3 tsp.), or Liquid Smoke (1/2-1 tsp.), mustard (1 tsp. dry, or up to ¼ c. of the stuff in a squeeze bottle), a dash of cayenne, a little Tabasco sauce. Basically any spice that you like!  Another idea is to use pineapple juice in place of the water.  With that one, try just a tablespoon or two of brown sugar.  Or use orange juice and honey with ½ tsp. ginger.

 
Picture
To make BBQ Beef, brown a roast in a couple tablespoons of hot oil.  Pork or chicken are also good.

Picture
Add all the Barbecue Sauce ingredients.  If you have a tight-fitting lid, or are using a crockpot, don't add the cup of water.   A little vinegar in the sauce will help tenderize the meat.  In this batch, I used 2 Tbsp. apple cider vinegar, and 1/4 c. honey. 

Picture
When the meat is cooked and tender, remove the lid and boil until the sauce thickens enough to coat. 

Picture
Shred or slice the meat, then stir together with the sauce.  Delicious!  Just the right amount of sweetness for me.  Store-bought sauce is always too sweet, in my opinion.  I still buy it when it's cheap, but mix it with some plain tomato sauce.

0 Comments

Gladness and Cheer, Just-Fruit-and-Nut Bars

10/27/2010

0 Comments

 
Picture
Picture
Picture
(Originally 9/2/10)

I love this time of year!  The temperatures have dropped enough that the roses are reblooming, the grass is having an easier time, and the mornings and  late evenings have the smell of earth and coolness.  The garden is in full swing, tomatoes are fragrant and sweet,  most of the lumps that come out of my garden are potatoes instead of rocks, and I get to be creative using squash again.  What a fulfilling time, enjoying the fruits of our labors (or others’ labors, if you prefer the farmers’ market or grocery store).  It brings to mind   D&C 59:18-19 “Yea, all things which come of the earth, in the season thereof, are made for the benefit and the use of man, both to please the eye and to gladden the heart;

   Yea, for food and for raiment, for taste and for smell, to strengthen the body and to enliven the soul.”

I’m grateful for the beauties of the earth that the Lord has given us, for the wonderful things he’s put here for us to wisely enjoy.  The recipe at the end of the email uses nothing but some of these things that grow for us. Enjoy!


Here is a bit from Elder Maxwell, from a talk he called “Be Of Good Cheer”- both sobering and encouraging. 


“We are living in a time in which we shall see things both wonderful and awful. There is no way that we can be a part of the last days and have it otherwise. Even so, we are instructed by our Lord and Exemplar, Jesus Christ, to “be of good cheer.” (D&C 61:36; D&C 78:18.)

Jesus has given that same instruction to others before, when the stressful circumstances in which they found themselves were anything but cheerful.

“In the world ye shall have tribulation: but be of good cheer; I have overcome the world.” (John 16:33; italics added.)

What precious perspective we obtain from the gospel of Jesus Christ concerning things that really matter—against which we measure the disappointments of the day!

Jesus calls upon us to have a deliberate trust in God’s unfolding purposes, not only for all humankind but for us individually. And we are to be of good cheer in the unfolding process. The Lord has made no secret of the fact that He intends to try the faith and the patience of His Saints. (See Mosiah 23:21.) We mortals are so quick to forget the Lord: “And thus we see that except the Lord doth chasten his people with many afflictions … they will not remember him.” (Hel. 12:3.)

Given the aforementioned grand and overarching reasons to rejoice, can we not “be of good cheer” in spite of stress and circumstance?

President Brigham Young said of a geographical destination, “This is the place.” Of God’s plan of salvation, with its developmental destination, it can be said, “This is the process”!   

(from “Be of Good Cheer” by Neal A. Maxwell,  Oct. 1982 Conference) http://lds.org/ldsorg/v/index.jsp?hideNav=1&locale=0&sourceId=1ca9c5e8b4b6b010VgnVCM1000004d82620a____&vgnextoid=2354fccf2b7db010VgnVCM1000004d82620aRCRD
If you can make the time, please read the whole thing, it’s wonderful!


Now for the recipe: these fruit/nut bars are basically the same as the old-old recipe for ‘fruit balls’ or ‘dried fruit candy’, if you’ve run across those before.  The dates are there both for sweetness and stickiness to hold the whole thing together.  

Just-Fruit-and-Nut Bars (the original 'energy bar') and naturally gluten-free!

1/3 cup chopped pecans - toasting the nuts will increase the flavor
1/3 cup chopped dates
1/3 cup chopped dried apples 

 Put the pecans in a food processor (or blender?) and chop until finely ground.  Remove and do the same with dates and apples.  Add the nuts back in, add a pinch of cinnamon, and process until it holds together.  Divide into 6 pieces, mold each one into a bar, and wrap tightly in plastic wrap, waxed paper, or parchment.  81 calories each, if you care.   (I’m thinking these things ought to be double-sized- plus I’ll make my batch with 1 cup of each ingredient.)

If you can’t have nuts: the nuts are there to give body and fat for shaping, digestibility and energy, so try a combination of chopped-up rolled oats and coconut oil (or butter)

Variations:

Apricot-Almond: use equal amounts dried apricots, dates, and almonds

Cherry Tart:  equal parts dried cherries, dates, and walnuts or almonds

Peanut Cookie: use peanuts and only dates (2/3 cup).  Add a pinch of salt and a bit of vanilla.

Cashew Cookie: same as Peanut Cookie, except use cashews.

How about using dates, dried pineapple, macadamias, then rolling in coconut?

Or use any nut and dried fruit you have, or whatever else sounds good…..

 
0 Comments
Forward>>

    Need a Search bar?
    One day I may upgrade my website-- but until then, use your web browser search bar. Type in my web address and what you're looking for, like this-- 
    www.theprovidenthomemaker.com  pumpkin --  and you should get results.


    Author

    I'm a disciple of Christ, a member of the Church of Jesus Christ of Latter-day Saints, a family-defending, homemaking, and homeschooling mom of eight children, two of whom sometimes can't have milk or wheat. Growing up on a farm in a high mountain valley, my parents taught me to 'make do', work hard, smile, and help others.  I love cooking, learning, growing food and flowers, picking tomatoes, and making gingerbread houses --which CAN be made allergy-friendly-- with my children.  I hope you find something to help you on my site!

    Archives

    April 2024
    July 2023
    April 2022
    September 2021
    March 2021
    December 2020
    April 2020
    March 2020
    February 2020
    January 2020
    December 2019
    November 2019
    October 2019
    September 2019
    August 2019
    July 2019
    June 2019
    May 2019
    April 2019
    January 2016
    November 2015
    October 2015
    September 2015
    March 2015
    February 2015
    November 2014
    October 2014
    September 2014
    August 2014
    July 2014
    June 2014
    May 2014
    April 2014
    March 2014
    February 2014
    January 2014
    December 2013
    November 2013
    October 2013
    September 2013
    August 2013
    July 2013
    June 2013
    May 2013
    April 2013
    March 2013
    February 2013
    January 2013
    December 2012
    November 2012
    October 2012
    September 2012
    August 2012
    July 2012
    June 2012
    May 2012
    April 2012
    March 2012
    February 2012
    January 2012
    December 2011
    November 2011
    October 2011
    September 2011
    August 2011
    July 2011
    June 2011
    May 2011
    April 2011
    March 2011
    February 2011
    January 2011
    December 2010
    November 2010
    October 2010
    September 2010

    Categories

    All
    Alcohol
    Alternate Cooking
    Appearances
    Apple
    Apricots
    April Fools
    Aprons
    Bananas
    Beans
    Beef
    Beets
    Bench
    Beverages
    Bonnet
    Bread
    Breakfast
    Budget
    Budgeting
    Cake
    Candy
    Canning
    Carrots
    Cheese
    Chicken
    Children
    Chocolate
    Christmas
    Cleaning
    Coconut
    Comfrey
    Common Core
    Constitution
    Cookbook
    Cookies
    Cooking Oil
    Crafts
    Dairy Substitutions
    Dehydrating
    Dessert
    Dried Fruit
    Earth Oven
    Earthquake
    Easter
    Edible Weeds
    Eggs
    Emergency Prep
    Essential Oils
    Faith
    Family Home Evening
    Fertilizing
    Food Storage
    Fourth Of July
    Freezer
    Frosting
    Fudge
    Garden
    Gardening
    Gingerbread
    Gluten
    Gluten Free
    Gold
    Government
    Grains
    Gratitude
    Hat
    Herbs
    Home Remedies
    Home Repairs
    Homeschool
    Home Storage
    Honey
    Hope
    Inflation
    Leftovers
    Legumes
    Lemon
    Main Dishes
    Mixes
    Mothers
    Noah
    Non Artificial Colors
    Non-artificial Colors
    Nuts
    Oats
    Oil
    Orange
    Paint
    Peaches
    Pear
    Pie
    Pizza
    Plums
    Poem
    Popcorn
    Pork
    Potatoes
    Powdered Milk
    Prayer
    Preparedness
    Projects
    Prophecy
    Pruning
    Pumpkin
    Quick Bread
    Rhubarb
    Rice
    Salad
    Salt
    Sauces
    Self Reliance
    Self-reliance
    Sewing
    Shelf Life
    Shelves
    Sky
    Smoothie
    Snacks
    Soup
    Spices Or Seasonings
    Squash
    Strawberries
    Substitutions
    Sugar
    Summer Fun
    Three Month Supply
    Time
    Tomatoes
    Trees
    Truffles
    T-shirts
    Tuna
    Ultra Gel
    Valentine\'s Day
    Vegetables
    Water
    Watermelon
    Wheat
    Work
    Year Supply
    Zucchini

    RSS Feed

Web Hosting by iPage